GETTING STARTED
Quick start guide
To start sending notifications using our platform through Postman, follow the steps below.
Prerequisites:
Before you begin, ensure you have:
- A registered account on our platform.
- Postman installed on your machine.
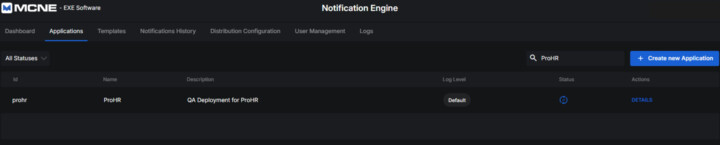
Create a New Application
- Log in to the platform and navigate to the Applications tab.
- Click the “Create New Application” button.
- A new form will appear. Fill in the fields:
- ID (required) – A unique identifier for the application. Once saved, it cannot be changed.
- Name (required) – The name of your application.
- Description – Optional; helps you identify the purpose of the application.
- Active – Set the status of the application: Active or Inactive.
- When you are done:
- Click “Save” to save your progress and stay on the page.
- Click “Save and close” to save and return to the application list.
Note: Each application automatically gets a unique API key. This key is read-only and cannot be modified.
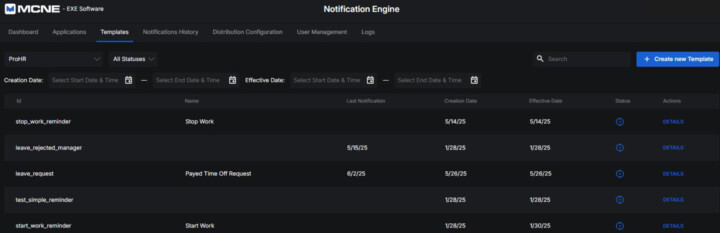
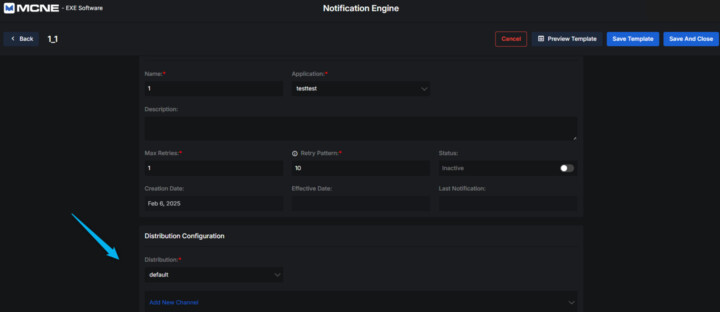
Create a Notification Template
- Go to the Templates tab.
- Find and select the application you just created.
- Click the “Create New Template” button.
- Fill in the required fields:
- ID
- Name
- Application (select the one created earlier)
- Max Retries
- Retry Pattern
- Distribution
Note: Each application automatically gets a unique API key. This key is read-only and cannot be modified.
- To configure the notification channel:
- Click “Add New Channel”.
- Select the channel you want to send notifications through (e.g., Email, Slack, Microsoft Teams, etc.).
- For each channel, you can specify:
- Subject
- Body (in HTML or Jinja format — you can use dynamic variables here).
- After entering the necessary information, click Save Template.
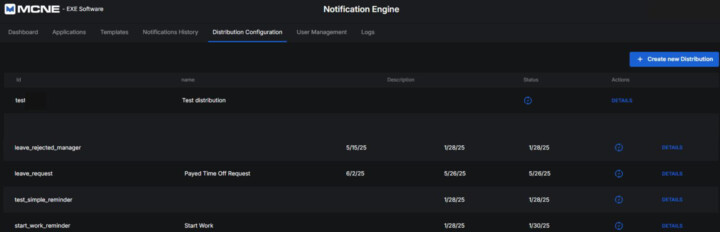
Create a Distribution
- Navigate to the Distribution tab.
- Click “Create New Distribution”.
- Fill in the required fields:
- ID
- Name
Note: Once a distribution is saved with and ID, this ID cannot be changed.
- Save the distribution.
- Configure the Email Settings or other channel configurations, then save again.
Link the Template to the Distribution
- Return to the Templates tab.
- Locate the template you created earlier and click “Details”.
- Click “Edit Template”.
- In the Distribution dropdown, select the distribution you created in the previous step.
- Click Save and Close.
Send a Notification with Postman
- Open Postman.
- Use the appropriate API endpoint to trigger a notification using the template and application you’ve just configured.
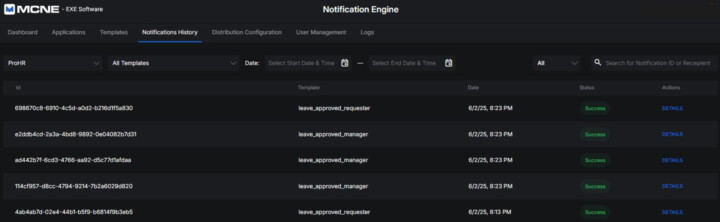
- Once sent, go to Notifications History in the platform.
- Select your application to view the status and delivery logs of the notification.
That’s it!
You’re now ready to send and track notifications across multiple channels using your configured templates and distributions.
Monitor the Notification Status
- Go to the Notifications History tab.
- Select your application.
- View the status, delivery logs, and response data if your notification.